Getting Started
This section explains how to setup Gmail Notifier Pro to monitor a Gmail account and explains the basics of the application.
Running Gmail Notifier Pro
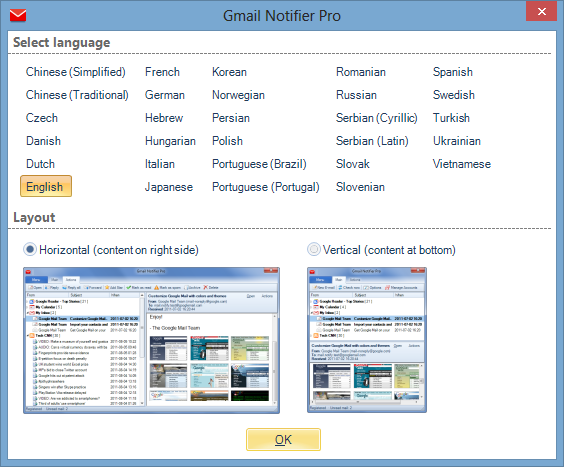
When Gmail Notifier Pro is started the first time, a dialog with language and layout options will be displayed.
By default, English is the selected language, but this can be changed by clicking on any of the other languages.
Click
OK to continue.
Main window
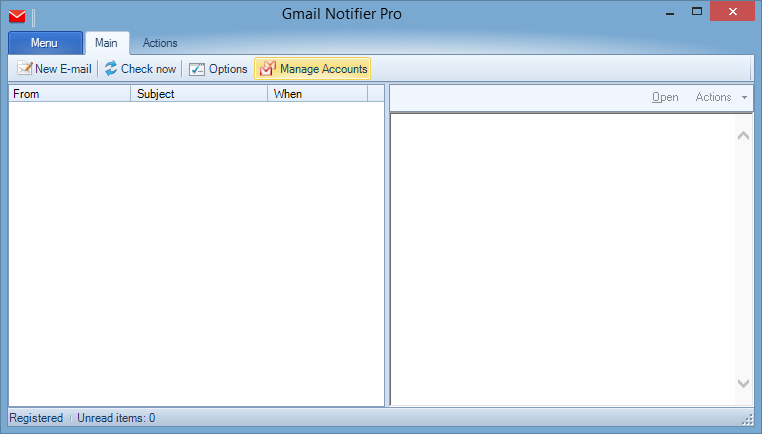
When Gmail Notifier Pro is started, the Main window will be displayed. The Main window will display a complete list of all configured accounts.
When running Gmail Notifier Pro the first time, the list is empty.
To add a new Gmail account to be monitored, click the button
Manage Accounts as indicated in the image below.
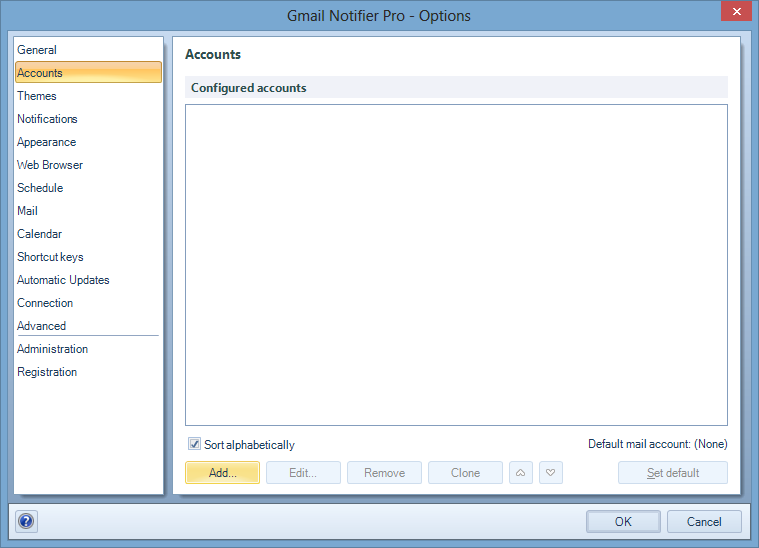
Add Gmail account
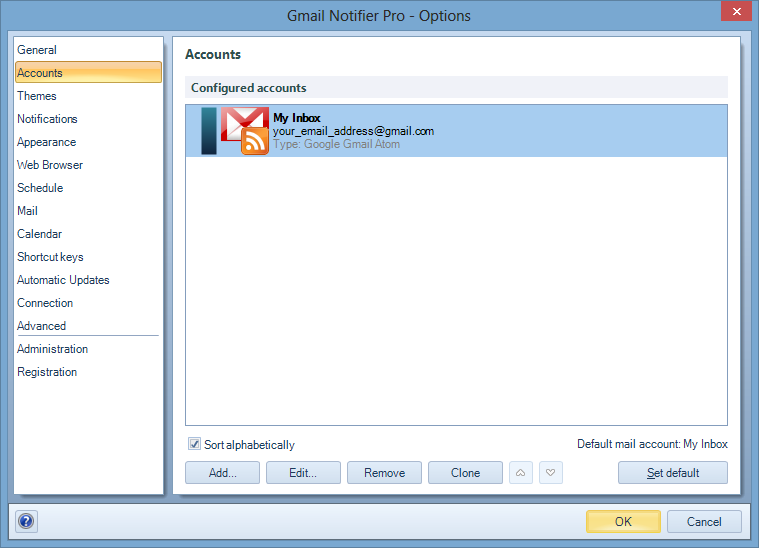
The dialog opened is the Options dialog, with the Accounts page selected. This page will display a complete list of all configured accounts, but is now empty.
To add a new account, click the button
Add as indicated in the image below.
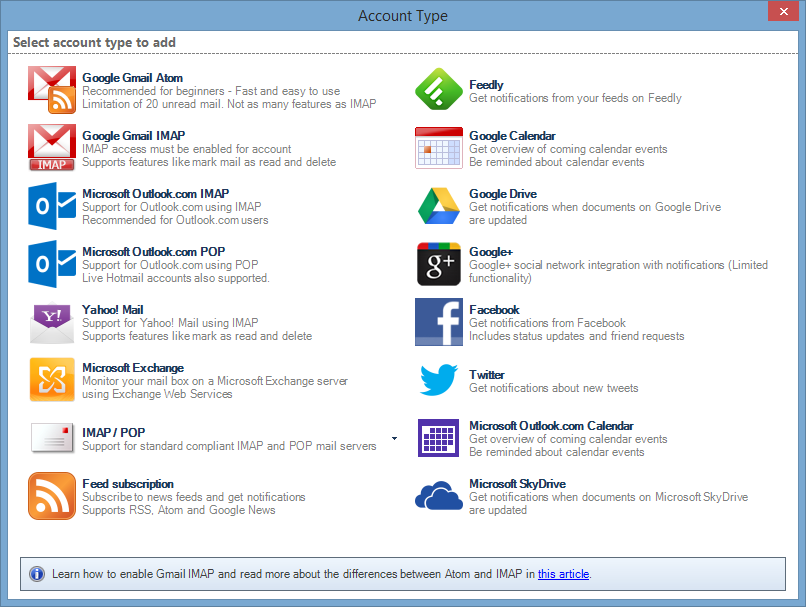
Select account type
The next dialog lists the supported account types. Select the type of account you want to add. In this example Gmail Atom will be used.
Enter account settings
Enter a description of the account, the E-mail address and the password.
The button
Test account settings can be used to verify that the entered information is working.
It's also possible to select a different theme. The themes defines colors to be used for the visual notifications.
Click
OK to add the account.

Account added to list
Now the new account is added to the list of configured accounts. To save the changes, click
OK.
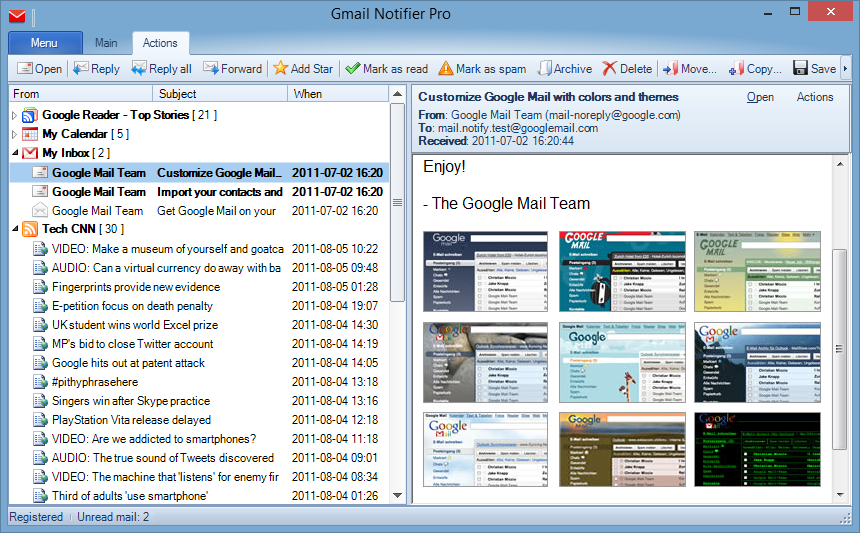
Main window with new account
The new account can also be seen in the Main window. The screenshot below show the new account
My Inbox, together with other added accounts.
Each unread mail for the account is
displayed below with information like sender, subject and date.
In the image below, one mail is selected and a summary of the mail content is displayed in the bottom section of the window. The selected mail can also be opened in the web browser
by clicking the
Open button. The
Action button can be clicked and will then open a menu with additional operations for the mail,
for example to reply.
Please note that operations like mark as read and delete mail are only supported for Gmail IMAP accounts, not Gmail Atom accounts.
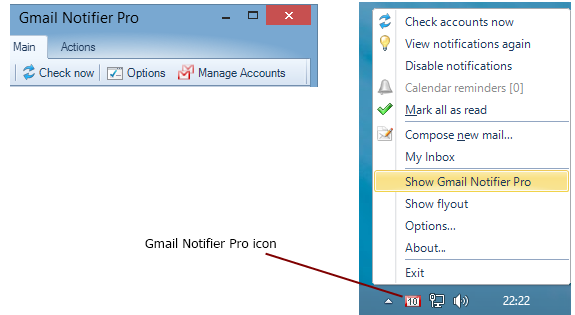
Closing & Icon
The main window can be closed by clicking the close button in the upper right corner, see the left part of the image below.
Gmail Notifier Pro will still be running and an icon will be present in the system tray area, as indicated in the right/bottom part of the image below. By clicking the icon
with the left mouse button, the Main window will be re-opened. It's also possible to right click on the icon to get a menu with several operations available. The icon
also indicates to total amount of unread mail for all configured mail accounts.
To close the application completely, select
Exit in the menu.
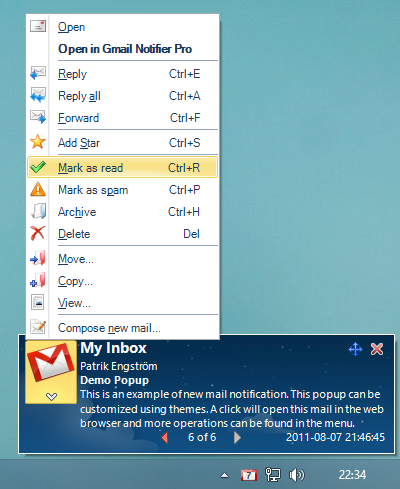
Notifications
When the new account was added, it was also checked for new messages. The account will also be checked by regular interval (configurable) for new mail. When new mail is received,
a notification will be displayed in the bottom right corner of the screen, as illustrated in the image below.
By clicking the text in the notification it's possible to open the message in the web browser. Additional operations can be found by clicking the image button.
If multiple messages are being notified, it possible to use the left and right arrow buttons to navigate between the each message. After a short time, the next message
will automatically be displayed.